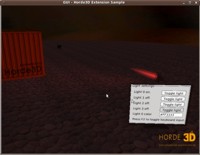
| The GUI extensions adds a GUi system to Horde3D which can be used to display both 3D GUIs and 2D menus. This is done by defining a common GUI scene node which renders 2D geometry at the local xy plane of the scene node. All GUI elements are skinnable. The GUI uses wchar_t for all strings.
The extension was presented in the forum here: http://www.horde3d.org/forums/viewtopic.php?f=6&t=1065
Getting the extension
The extension is in my mercurial fork of the official horde3d repository at http://bitbucket.org/mgottschlag/horde3dext/. Click on "get source" in the upper right corner to download a snapshot of the sources.
The repository contains always-up-to-date CMake files, but the MSVC files might be outdated. If you cannot compile Horde3D, ask in the forum thread mentioned above.
Font rendering options
If compiling with CMake, you can select FreeType font rendering via cmake options as an alternative to the internal font renderer. This provides better looking text, but comes with the disadvantage that you need FreeType development files and the CMake freetype module installed. Only has been tested on Linux so far.
Implemented widgets
- Buttons
- Edit boxes
- Check boxes
- Group boxes
Position system
For pixel-perfect layouts at all (and even at varying) screen sizes, a combination of relative and absolute addressing is used. A position (or size) is built from 4 values, 2 absolute ones in pixels, and to values relative to the screen size. For example the position (0.5, 10, 0.25, -20) with a screensize of 1280 * 1024 pixels would result in the absolute position with x = 0.5 * 1280 + 10 = 650 and y = 0.25 * 1024 - 20 = 236.
Rendering
The GUI resource only provides position and UV coordinate information for the vertices, the normals are assumed to be along the local z axis.
The GUI scene node only can render quads, and the quads are put together in batches. The batches are cached and only updated when necessary (though this can still be optimized, much more is updated than what would be necessary atm).
The font glyphs are rendered in software once when they are used for the first time and then saved to a texture specified in the font resource (for an example resource see the GUI example in the repository).
Usage example
The following code creates a GUI with one button and one edit box:
H3DRes fontMatRes = h3dAddResource( H3DResTypes::Material, "overlays/font.material.xml", 0 );
// GUI skin
H3DRes skinRes = h3dAddResource( H3DGUI_ResType_Skin, "skins/gui.skin.xml", 0 );
// Load resources
h3dutLoadResourcesFromDisk( _contentDir.c_str() );
// Add gui
H3DNode gui = h3dguiAddGUI( screen, "GUI", skinRes );
h3dSetNodeTransform( gui, 0, 0, 0, 0, 0, 0, 0.8f, 0.6f, 1 );
// Set virtual screen size
h3dSetNodeParamI( gui, H3DGUINode::WidthI, 320 );
h3dSetNodeParamI( gui, H3DGUINode::HeightI, 240 );
H3DGUIElement root = h3dguiGetRoot(_gui);
h3dguiSetElementParamI( _gui, root, H3DElementParam::ShowBackgroundI, 1 );
// Add a frame around the elements
H3DGUIElement frame = h3dguiAddFrame(_gui, root);
h3dguiSetElementParamStr( _gui, frame, FrameParam::LabelStr, L"Example GUI" );
// Add an editbox
H3DGUIElement editbox = h3dguiAddEditBox(_gui, frame);
h3dguiSetPosition( gui, editbox, 0.1f, 0, 0.1f, 0 );
h3dguiSetSize( gui, editbox, 0.8f, 0, 0.3f, 0 );
h3dguiSetElementParamStr( gui, editbox, EditBoxParam::TextStr, L"EditBox" );
// Add a button
H3DGUIElement button = h3dguiAddButton(gui, frame);
h3dguiSetPosition( gui, button, 0.f, 0, 0.5f, 0 );
h3dguiSetSize( gui, button, 0.8f, 0, 0.3f, 0 );
h3dguiSetElementParamStr( gui, button, ButtonParam::LabelStr, L"Button" );
// Set an action ID for the button
h3dguiSetElementParamI( gui, button, H3DElementParam::ActionIdI, 1 );
Mouse and keyboard input are injected like this:
// Insert printable char
h3dguiInsertChar( gui, 'A' );
// Insert special key (1 = pressed)
h3dguiInsertKey( gui, H3DGUIKey::Return, 1 );
// Insert new mouse position
h3dguiSetMousePosition( gui, 100, 100 );
// Insert left mouse button event (0 = left mouse button, 1 = pressed)
h3dguiSetMouseButton( gui, 0, 1 );
Events from the GUI are handled like this:
while( h3dguiHasEvent( gui ) )
{
        int type = h3dguiGetEventType( gui );
        unsigned int actionid = h3dguiGetEventActionID( gui );
        if( type == H3DGUIEvent::Action && actionid == 1 )
        {
                std::cout << "Button has been pressed!" << std::endl;
        }
}
There also is an example showing how to use a 3D GUI in the repository at Extensions/GUI/Sample.
Screenshot

Things still missing
Feel free to participate here:
- Windows, dialogs, modal events
- List boxes
- Radio buttons
- Copy/Paste
- Image elements
|

